Perklist offers an interactive menu that improves your guest experience
The menu capabilities within Perklist offer you more flexibility in showcasing your dishes and helping guests with their meal choice selection. You can choose to show all your menu options, just your specials, or even offer hidden menus only available to certain people or at certain times.
Guests can easily scan the menu, search for specific items, mark options for quick comparisons, and save favorites for future visits. Setting up your menu items and pictures is easy, and businesses that aren’t restaurants can use these features to display other products and services.
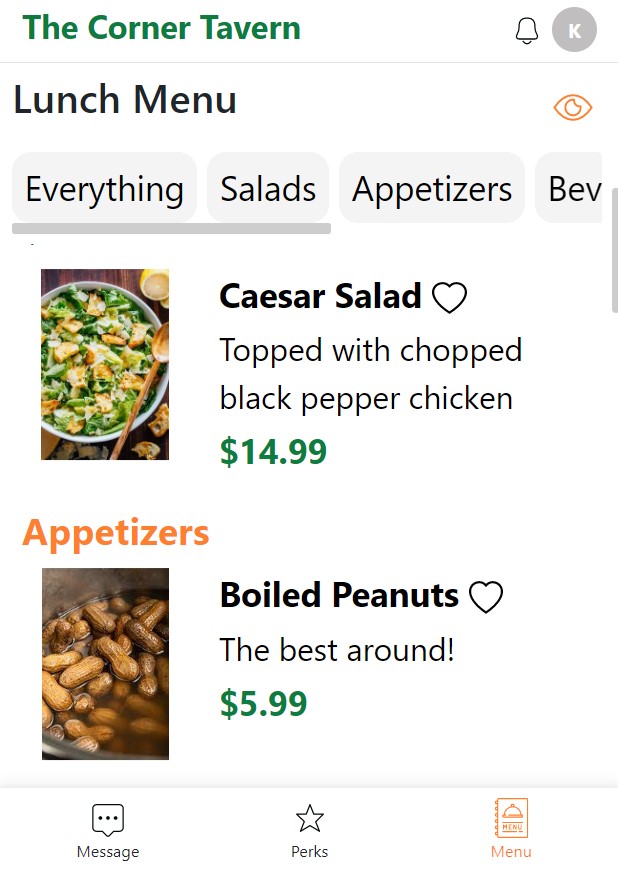
Guest experience: - After a guest scans a QR Code, they are greeted with an interactive mobile experience.
This experience offers guests several benefits over traditional menus:
- Menu navigation: Easy navigation between menu items and categories to allow guests to search for items based on categories.
- Favorites: The option to mark items as favorites to easily compare menu options or save items to remember for future purchases.
- Font size: Increase the font size of the menu so it is easier to read.
- Hidden items: Join your loyalty program to view hidden menu items not available to the general public.

Configuration and setup: To create new menus for your guests, log into your account and navigate to the Menu section in the top navigation bar. From here, you can create your first menu.
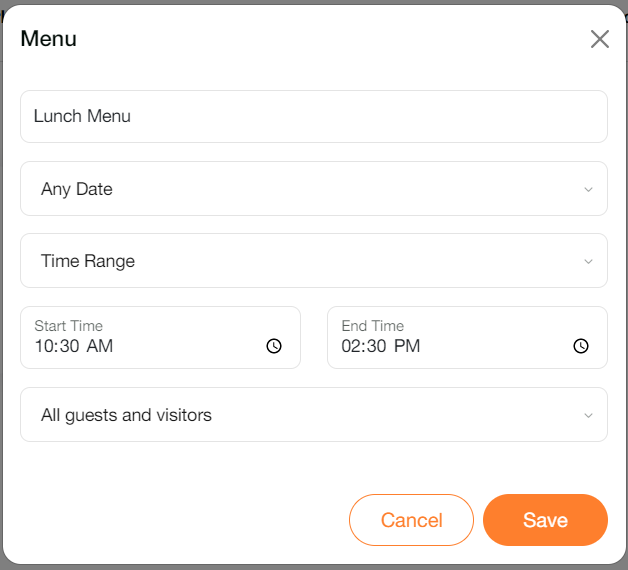
You can add a simple menu that is available for all guests at all times, or utilize the menu options to customize the viewing availability:
- Date: Set the menu to be available on any date, or customize this option to restrict the menu to only show on specific days. This can be used to create Daily Specials, seasonal menus, or weekday vs. weekend options.
- Time: Menus can be available any time of the day, or you can restrict menus to only display during specific times. This can be used for meal specific menus such as lunch and brunch menus or for happy hour specials and other options.
- Audience: Choose whether a menu is available to all guests, or restrict specific menus to only show for loyalty members, specific levels, or a custom selection of guests.

After creating a menu, it’s simple to add your individual menu items. Select the option to add a new item and enter the item name and description. Only the name and description are required, but you have the option to choose a menu category, price, and upload a picture.
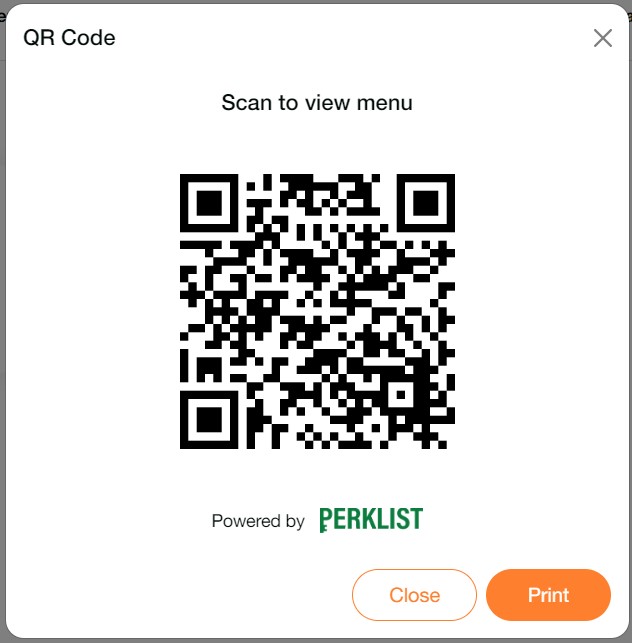
To share the menu, navigate to the Menu section in the top navigate bar and select the QR Code option. This generates a unique QR Code that could be displayed digitally or printed and left for guests to scan.

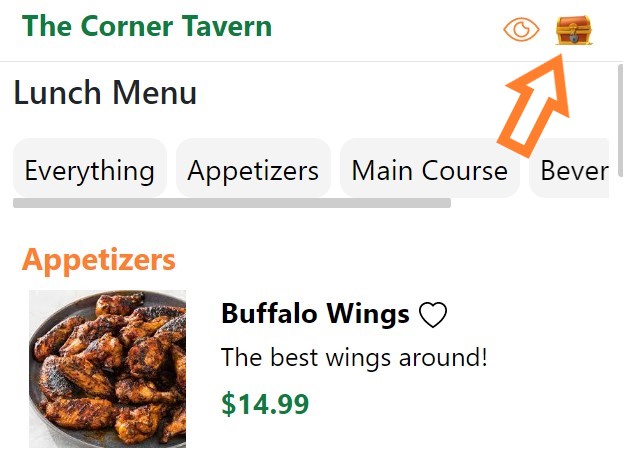
If you would like guests to have the option of joining your Perklist account from the menu, you can easily enable this through your Invite Options. Navigate to your Profile section > select Invite Options > and enable the menu. When enabled, guests will see a treasure chest icon that displays on the menu. They can select this, view your customized message, and join your Perklist account.

Create a delightful interactive menu experience for guests and build your Perklist account through guest signups. To learn more or schedule a demonstration, please contact our team at support@perklist.com.